Ultimate Valorant FPS-Boost Settings and Tweaks (5 Methods)
Learn how you can tweak Valorant to gain significant increase/boost in FPS up to 60-140 fps!
You may have a potato machine that’s already few decade old and in this article I’ll share the settings and configurations that you must adjust to improve your gaming experience!
Video Tutorial
FPS-Boost Tweak Outline
- Tweak Valorant’s In-Game Settings
- Graphics Profile (Set Valorant as High Performance)
- Reduce Windows Animations & Power Scheduling
- Optimize Power Plan
- Configure Game Render Quality
Tweak Valorant In-Game Settings
This one is the most obvious one, however I decided not to exclude this tip as this is definitely important basic tweak that affects significantly game performance.
So, tweak the Valorant’s in-game settings by going to the settings (click on the gear icon top right, or press esc, go to lobby and the button is placed on top right) then go to Video tab, then go to Graphics Quality.
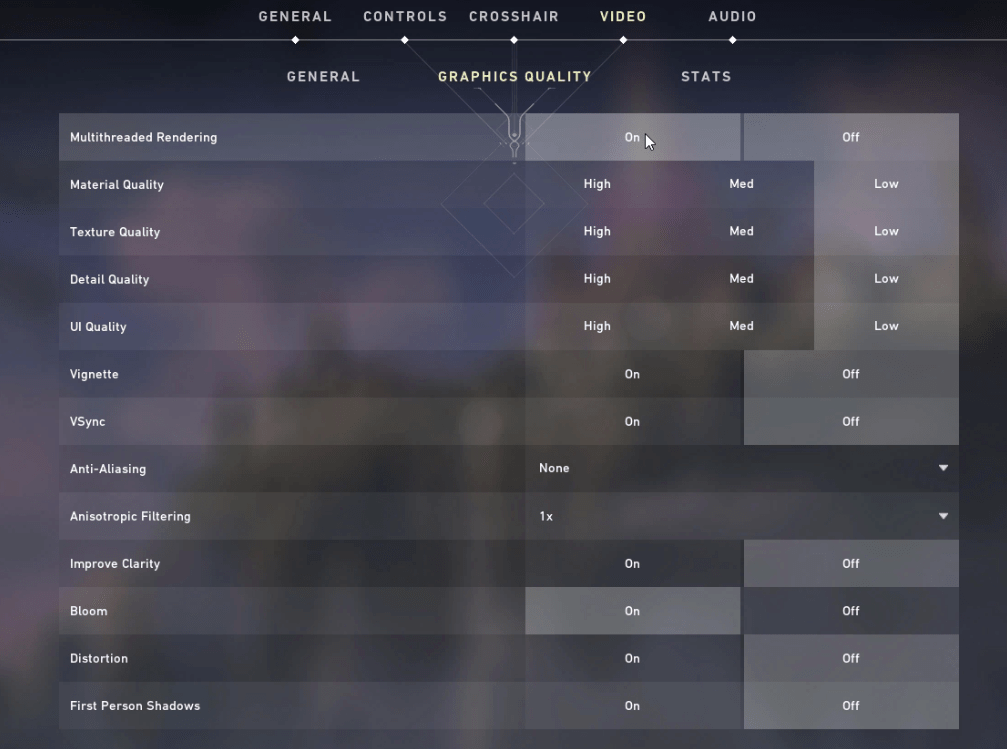
The most important settings are the multithreaded rendering, (material, texture, detail, ui) quality, vsync, anti-aliasing, anisotropic filtering and first person shadows.
The rest you can change depending on your preference however I would recommend to copy the same configurations as shown above.
Graphics Profile (Set Valorant to High Performance)
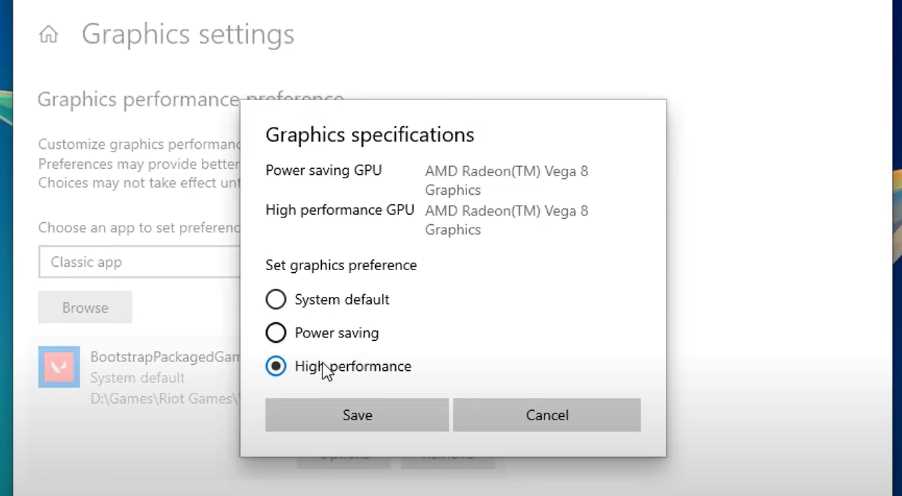
Open up start menu, and search Display Settings then open it up. Scroll down until you see Graphics Settings then click on the browse button.
Locate Valorant installation folder, up until the “live” folder where Valorant.exe is located.
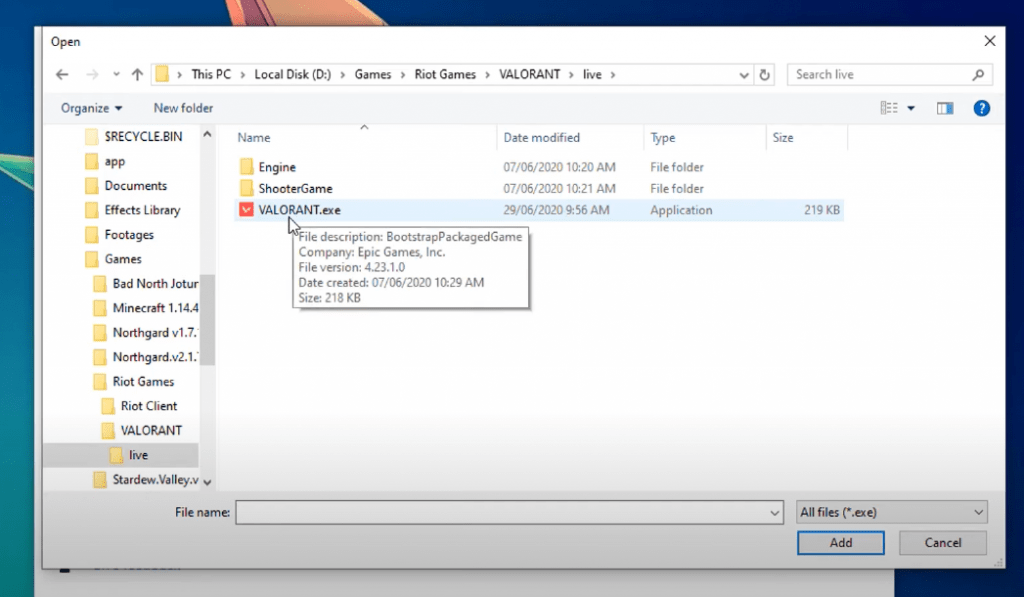
Click on the options button, and under the “Set graphics preference” choose High performance.
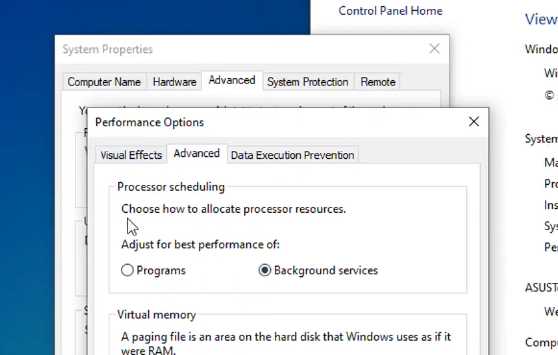
Reduce Windows Animations & Power Scheduling
Go to start menu, search for control panel then go to System and Security. Click on System and on the top left portion, click on “Advanced system settings”. Click on the advanced tab and click on the settings button on the “Performance” group.
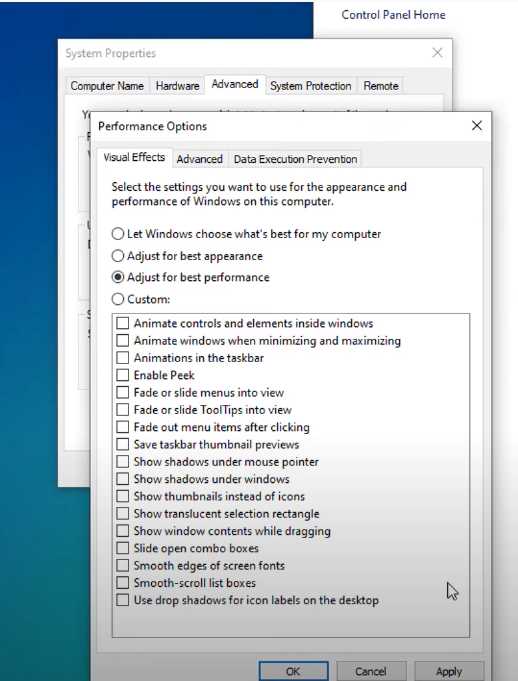
Select Adjust for best performance under the Visual Effects tab, and on the Advanced tab click on Adjust the best performance to Programs.
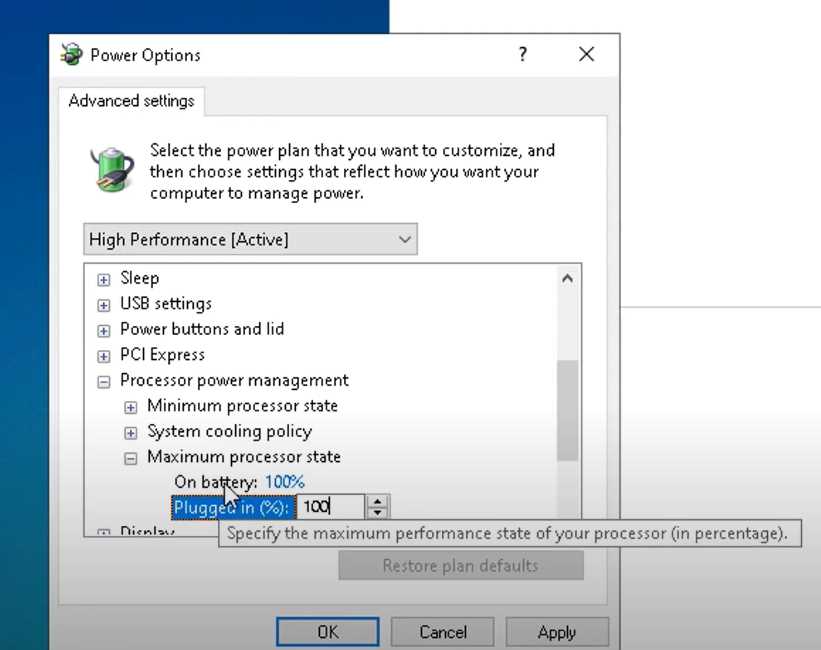
Optimize Power Plan
Open up start menu, search for Power Options. Alternatively, you can right click on the battery icon on taskbar if you have one and select Power Options.
Be sure you are on the High performance power plan. Click on the change plan settings of the High performance power plan then click change advanced power settings.
Find Processor Power Management and set the maximum processor state to 100%.
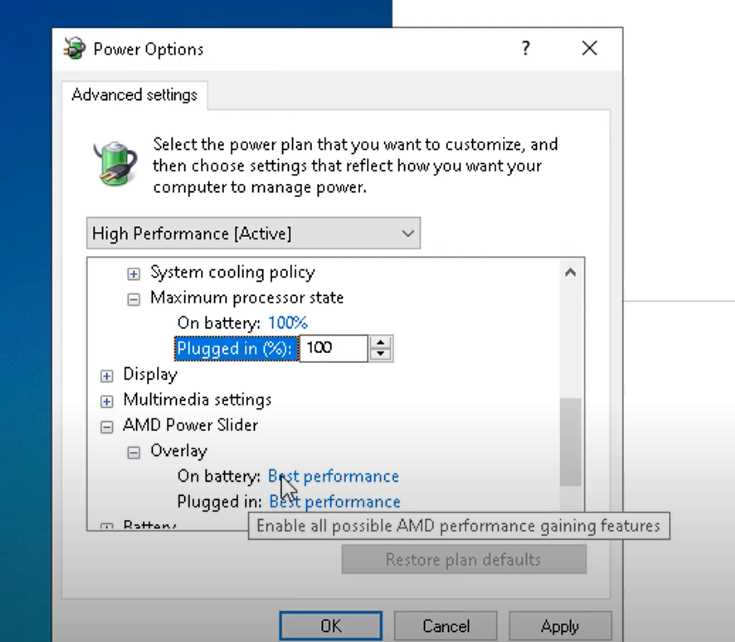
Next, this step is optional. If you have the “Amd Power Slider” option, expand that one and be sure to set the Overlay to Best Performance.
Hit apply and ok once done.
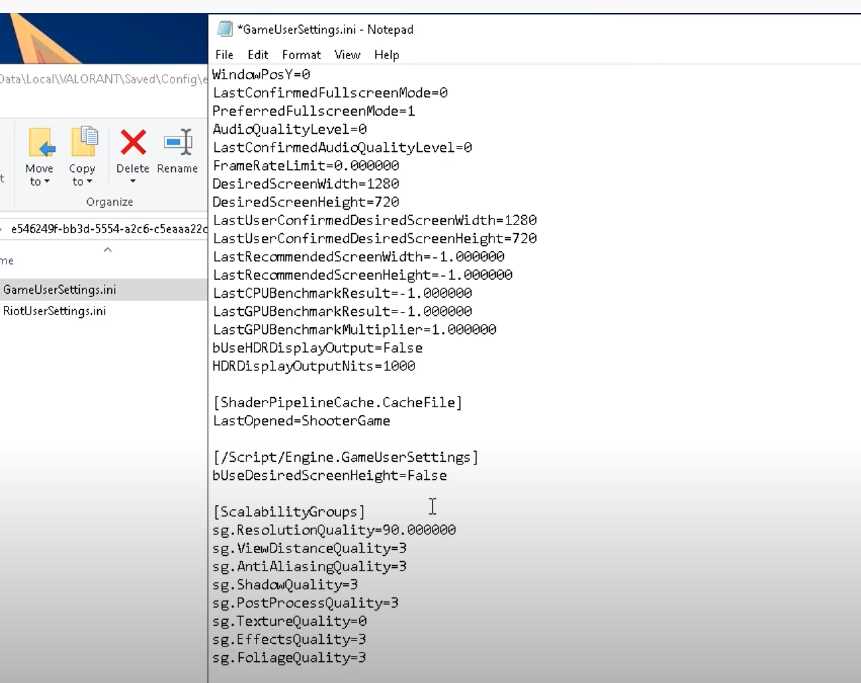
Reduce Game Render Quality
Open up a file explorer, then go to the address bar and type in %appdata%
Click on the roaming folder o the back icon to go one directory backwards and go to the Local folder.
Look for the Valorant folder and navigate through the Saved folder until you see the Config folder.
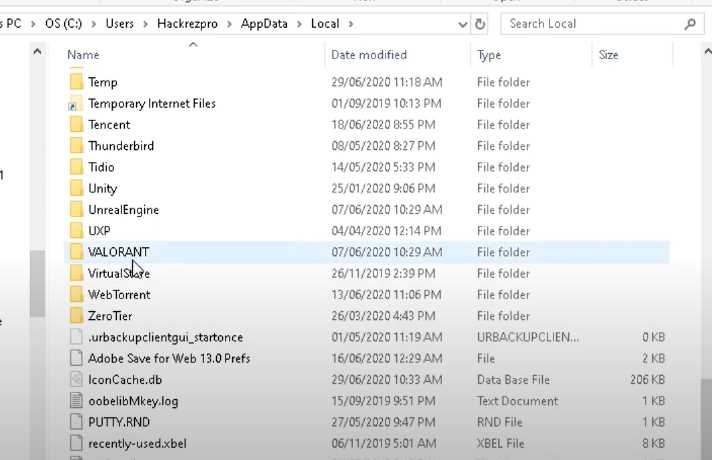
Open up the config folder and look for ALL the folders under the (Valorant/Saved/Config directory) that has a file called GameUserSettings.ini
Open up the GameUserSettings.ini and scroll down until you see sg.ResolutionQuality setting.
Set this one depending on your preference (80-95% has very minimal reduce in video quality).
The more you reduce this percentage value the more the game would reduce the game render quality.
The lesser the game render quality = the more blurry the game looks.
Once done, relaunch your game and tweak as to how much percentage should work optimally on your system.


