1

Fix Hyperscape The Procedure Entry Point Error

In this article I’ll show you the possible solutions to fix Hyperscape the procedure entry point error or vulan-1.dll hyperscape error while playing the newly released open-beta game Hyperscape.

There could be a number of possible causes for this one such as outdated graphics card, missing vulkan-1 dll file, and other gpu related problems.

I will show you here 5 major solutions for this particular error.

Fix Hyperscape The Procedure Entry Point Error

This kind of error in Hyperscape can be solved by a number of particular ways. This error points out that there’s something wrong with your system files and configuration, graphics driver incompatible/outdated drivers. Updating your graphics drivers usually addresses this issue but you might still be shown with the vulkan-1.dll hyperscape error. To fix this error on Hyperscape, simply follow through the detailed steps down below:

Fix 1: Update your graphics drivers

Yep, you might have heard this tip / solution too often times but this solution worked out for the most number of users that are trying to play the newly launched game! Updating your graphics drivers is one of the most important step in making sure that your graphics card is compatible with the game. The most practical method to do first when trying to fix Hyperscape The Procedure Entry Point Error is to update your graphics drivers. To update your drivers, follow the instructions below.

So go ahead to your Start menu > Search for device manager > Expand the Display Adapters to know which graphics card are you using.

Go to the official drivers download site depending on your manufacturer:

After the update process, restart your computer and see if Hyperscape is now working properly. Otherwise, if you encounter still the same error or the vulkan-1.dll hyperscape error, proceed e with the next step below which is to download the vulkan-1.dll itself and place it on your system.

Fix 2: Download Vulkan-1.dll for Hyperscape

Another fix for this particular issue is by downloading the vulkan-1.dll for your system. However, before doing this step, ensure that you have updated your graphics drivers to the latest version. Vulkan-1.dll Hyperscape error means that the game fails to launch or load properly due to the missing required DLL library component. So in order to resolve this missing library file, simply download the vulkan-1.dll and place it on your system folders and game directory folders. To do so, follow the steps:

Installing Vulkan-1.dll on System Folders

  1. Download Vulkan-1.dll.
  2. After downloading, extract the file to C:\Windows\System32
  3. If prompted to replace, select overwrite and replace.
  4. Next, extract the file in C:\Windows\SYSWOW64
  5. If prompted to replace, select overwrite and replace.

Note: You must have administrative privilege on your windows account to place these files on the system folders.

Next, Install Vulkan-1.dll on Hyperscape

  1. Open the download Vulkan-1.dll archive/zip file.
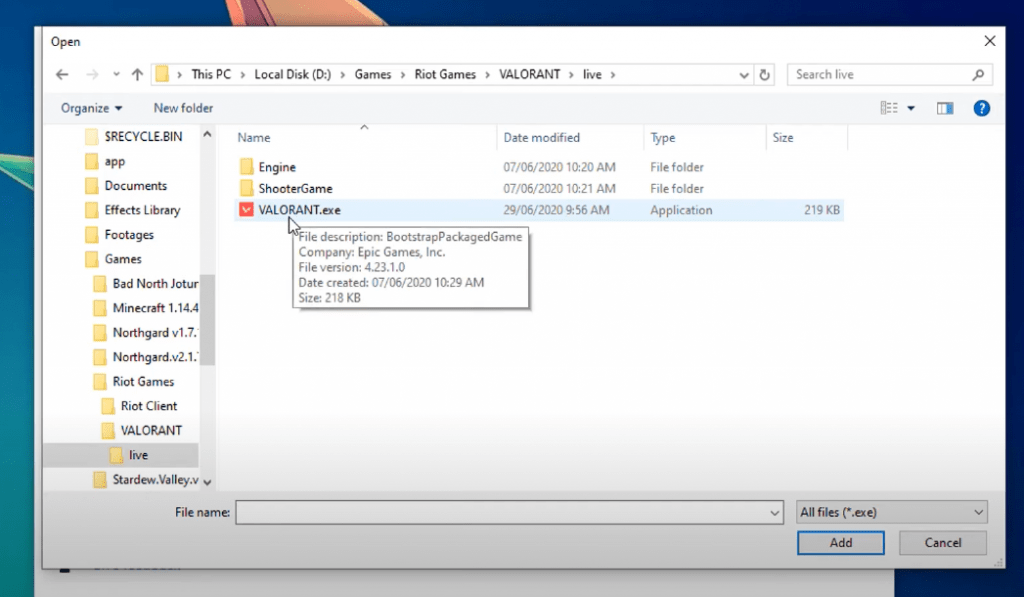
  2. Go to your Hyperscape installation directory folder, or
  3. Go to Ubisoft Game Launcher folder
    • C:\Program Files\Ubisoft Game Launcher or
    • C:\Program Files(x86)\Ubisoft Game Launcher
  4. Open the games folder, then open up Hyper Scape.
  5. Place the vulkan-1.dll on this folder.

Go ahead and try relaunching the game once done and see if the error got fixed.

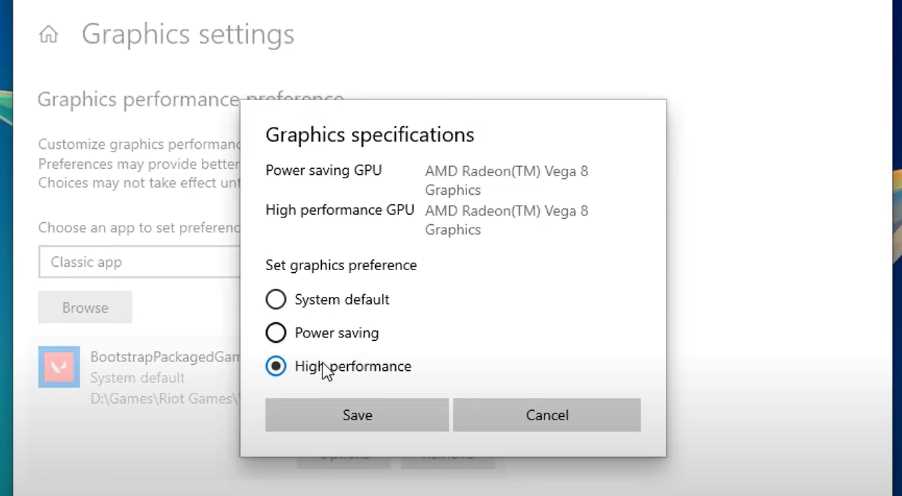
Fix 3: Set Hyperscape as High Performance

Another reason that could be causing this error on Hyperscape is that the system fails to provide the best graphics performance on the game itself. You can change this performance profile on Windows 10 to ensure that Hyperscape’s utilizes your GPU processing power. To change the gaming profile, follow these steps:

  1. Go to your Start Menu > Search for Graphics Settings.
  2. Open up Graphics Settings and browse for the Hyperscape game shortcut on your desktop.
  3. Set the graphics preference to High Performance.

After that, go ahead and try playing Hyperscape and see if Hyperscape The procedure entry point error is now fixed. If it still shows you the error, try these other fixes below.

Fix 4: Update the Driver using Device Manager

If in any case, the fixes above didn’t manage to solve Vulkan-1.dll error on Hyperscape, you can try updating your graphics driver using the device manager app on Windows. Sometimes, if your graphics card is no longer supported on the official website, a more updated graphics driver can be downloaded from the Windows Update repositories itself using the “Update Driver” option.

To update your graphics card using the device manager simply do these steps:

  1. Open up again Device Manager by searching “Device Manager” on your start menu.
  2. Expand the Display adapters and right click your display adapter.
  3. Click on Update Driver option. Wait for it to finish.
  4. Restart your computer afterwards.

Hopefully by that time, you manage to get Hyperscape The Procedure Entry Point Error fixed already. If still in any rare cases you still encounter the same error, kindly check the last fix on this guide.

Fix 5: Uninstall “unused” graphics drivers

Your last resort to fixing this problem is to check if you have any unused graphics drivers laying around on your computer. When you’ve upgraded or installed a new graphics card even a long time already, tendencies is that there’s still “leftover” driver laying around unused by your previous old graphics card or onboard graphics card. This can cause an issue with Hyperscape as instead of using your new GPU, Hyperscape might be forcing to use the old graphics driver detecting it as incompatible or outdated hence showing you Vulkan-1.dll error or The Hyperscape Procedure Entry Point error.

If you happen to have an extra graphics card driver installed on your computer, you can uninstall them by:

  1. Go to the Windows device manager app.
  2. Expand the display adapters, then identify which graphics driver is no longer being used.
  3. Right-click the graphics adapter and select the uninstall option.

Reboot your computer and see if the issue has been fixed. Hopefully by this time, you are now able to play the game without any issue. If you are confused with any particular step, feel free to watch and follow the video tutorial below and let me know your feedbacks in the comments section down below!

Video Tutorial


How to fix Valorant error code 68

In this article I’ll show you how you can fix Valorant error code 68 with the possible methods / solutions!

Fix Valorant Error Code 68

This guide will practically address the particular error, “Valorant has encountered a connection error, please re-launch the game” with the error code 68 shown along with this error window. A lot of players reported that they are experiencing Error Code 68 that pops out randomly during matches or while in-game. Error Code 68 is one of the many annoying error codes in Valorant.

There are possible various causes for this particular error and so carefully follow along the video tutorial or the text guide written below to get this problem fixed.

Video Tutorial

Step-By-Step Guide

Solution #1: Add Valorant to Firewall Exception

The first possible fix for Valorant error code 68 is to add valorant to firewall exception.

Open up Start Menu and search for Firewall & Network Protection and open it up.

valorant-error-code-68-allow-to-firewall-1

Click on the Allow an app through Firewall and click on the Change Settings button with the administrator shield icon.

valorant-error-code-68-allow-to-firewall-2
valorant-error-code-68-allow-to-firewall-3

Click on Allow another app button then browse for your Valorant shortcut file on desktop. Select the shortcut file and hit open button. It will add an app called RiotClientServices.

valorant-error-code-68-allow-to-firewall-4

Then add another app then navigate to your Valorant installation path. Open up the Valorant Folder.

valorant-error-code-68-allow-to-firewall-5

Open the live folder and add the Valorant.exe application to the firewall.

valorant-error-code-68-allow-to-firewall-6

This will add an app called BootstrapPackagedGame, and make sure that it is allowed for both private and public networks.

valorant-error-code-68-allow-to-firewall-7

Allow another app one last time, while on the same path navigate through Valorant Installation Path – “Valorant/live/shootergame/binaries/win64/” and then add the VALORANT-Win64-Shipping.exe to the exceptions.

valorant-error-code-68-allow-to-firewall-8
valorant-error-code-68-allow-to-firewall-9
valorant-error-code-68-allow-to-firewall-10

Be sure to have the rules for Valorant, BootstrapPackagedGame and RiotClientServices apps to be allowed both for private and public networks by ticking the respective checkboxes.

Solution #2: Change DNS on Windows

Another step that we can do to fix valorant error code 68 is to change dns on Windows.

valorant-error-code-68-change-dns-fix-1

Right click on your Windows network icon or wifi icon and click on Open Network & Internet Settings.

valorant-error-code-68-change-dns-fix-2

Click on Change adapter options then right click your network or wifi adapter click on properties.

valorant-error-code-68-change-dns-fix-3

Find Internet Protocol Version 4 (TCP/IPv4) then click on properties.

valorant-error-code-68-change-dns-fix-4

Click on the Use the following DNS addresses automatically. and enter the following respectively:

Preferred DNS Server: 1.1.1.1

Alternate DNS Server: 8.8.4.4

Save all the changes and restart your computer.

Solution #3: Use VPN Temporarily to play Valorant

Lastly, if all solution fails, try using a vpn and see if the valorant error code 68 gets fixed.

There had been reports that Valorant has some issues with routing with different ISPs as of the moment hence one way to temporarily address this concern rather than wait till it gets fixed by riot is to use VPN.

Signup for a free account (3-servers available for free) then download and install ProtonVPN.

valorant-error-code-68-fix-use-vpn

After installation, run the VPN and try playing the game if you still encounter error code 68.

Related Articles


How to fix Valorant error code 138 connection error

Learn how to fix Valorant error code 138 connection error easily with all the possible fix or solution. Valorant error code 138 can be fixed by these methods.

This error are reported to be occurring just recently with lower-end computers and so I have compiled the possible solutions SO FAR for this particular error code 138 connection error in Valorant.

Follow along on the video tutorial below or read through the step-by-step guide below.

Video Tutorial(s)

Step-by-Step Guide

Solution 1: Bcdedit Configurations

The first solution to fix error code 138 on Valorant is to apply some bcdedit configurations.

Open up a command prompt by going to your start menu and look for “Command Prompt” and make sure to run it as administrator.

valorant-connection-error-code-138-open-command-prompt

Type in the following codes:

bcdedit.exe /set {current} nx OptIn
bcdedit.exe /set testsigning off
bcdedit.exe /set nointegritychecks off

Note: If you experience “The value is protected by Secure Boot policy and cannot be modified or deleted” make sure to turn off first your secure boot option on your BIOS.

Next, restart your computer and check if Valorant is now working properly.

Otherwise, continue with the other possible fixes below.

Solution 2: Set Compatibility to Windows 8

Another solution to fix the error code 138 on Valorant is to Set the Compatibility to Windows 8.

Locate your Valorant shortcut icon on your desktop or start menu.

Right click on the shortcut and go to properties.

Check the “Run this program in compatibility mode for: Windows 8” and check the Run this program as an administrator. Hit the apply and ok button.

valorant-connection-error-code-138-set-compatibility-windows-8

Solution 3: Set VGC Process Priority to “Normal”

Another solution that you can try to fix error code 138 on Valorant is to set the VGC Process Priority to “Normal”.

Go ahead and open up task manager and look for the process “Vanguard tray notification” right click on it and click on go to details.

valorant-connection-error-code-138-open-task-manager

Right click on the process and make sure to set the priority to Normal.

Other possible soluton:

If all else fails and you still get error code on Valorant, kindly check if your processor is AMD A-Series processor such as AMD A6, A10, and so on. there had been reports that the Valorant’s Vanguard Anti-cheat system has a particular conflict / issue with these processors and also some other unnamed processors.

Riot is investigating the matter as of the moment and so if nothing fixed your problem and it still shows up error code 138, you’ll have to wait for a patch from Riot to address this issue.

Reddit thread Source

Related Articles


How to quickly enable fps and ping counter in Valorant

Learn how you can quickly enable fps and ping counter in Valorant!

In this article, If you’ve been an old-time FPS player before you will know how important it is to have the FPS and Network Latency / Ping shown right on your screen!

If you are just starting out, well it’s never too late to learn!

I have included in this article a video tutorial to demonstrate the steps or you can just read through the steps written right below it.

Video Tutorial

Steps to Enable Ping & Fps in Valorant

  1. Open up the game, and upon entering the lobby click on the gear icon on the top-right most portion of the screen.
  2. Click on settings. You’ll be taken to General tab by default go to Video Settings.
  3. While on the Video Settings, you will be shown with another 3 options.
  4. Open up the stats under the Video Settings.
  5. Enable “Client FPS” to show game fps and for the ping the options that you can enable are “Server Tick Rate”, “Network Round Trip Time” and “Packet Loss”.

Related Articles


Ultimate Valorant FPS-Boost Settings and Tweaks (5 Methods)

Learn how you can tweak Valorant to gain significant increase/boost in FPS up to 60-140 fps!

You may have a potato machine that’s already few decade old and in this article I’ll share the settings and configurations that you must adjust to improve your gaming experience!

Video Tutorial

FPS-Boost Tweak Outline

  1. Tweak Valorant’s In-Game Settings
  2. Graphics Profile (Set Valorant as High Performance)
  3. Reduce Windows Animations & Power Scheduling
  4. Optimize Power Plan
  5. Configure Game Render Quality

Tweak Valorant In-Game Settings

This one is the most obvious one, however I decided not to exclude this tip as this is definitely important basic tweak that affects significantly game performance.

So, tweak the Valorant’s in-game settings by going to the settings (click on the gear icon top right, or press esc, go to lobby and the button is placed on top right) then go to Video tab, then go to Graphics Quality.

graphics-quality-settings-valorant

The most important settings are the multithreaded rendering, (material, texture, detail, ui) quality, vsync, anti-aliasing, anisotropic filtering and first person shadows.

The rest you can change depending on your preference however I would recommend to copy the same configurations as shown above.

Graphics Profile (Set Valorant to High Performance)

Open up start menu, and search Display Settings then open it up. Scroll down until you see Graphics Settings then click on the browse button.

Locate Valorant installation folder, up until the “live” folder where Valorant.exe is located.

valorant-fps-boost-graphics-settings-tweak-1

Click on the options button, and under the “Set graphics preference” choose High performance.

Reduce Windows Animations & Power Scheduling

Go to start menu, search for control panel then go to System and Security. Click on System and on the top left portion, click on “Advanced system settings”. Click on the advanced tab and click on the settings button on the “Performance” group.

Select Adjust for best performance under the Visual Effects tab, and on the Advanced tab click on Adjust the best performance to Programs.

Optimize Power Plan

Open up start menu, search for Power Options. Alternatively, you can right click on the battery icon on taskbar if you have one and select Power Options.

Be sure you are on the High performance power plan. Click on the change plan settings of the High performance power plan then click change advanced power settings.

Find Processor Power Management and set the maximum processor state to 100%.

Next, this step is optional. If you have the “Amd Power Slider” option, expand that one and be sure to set the Overlay to Best Performance.

This option is only available to some AMD powered desktops or computers. This step is optional.

Hit apply and ok once done.

Reduce Game Render Quality

Open up a file explorer, then go to the address bar and type in %appdata%

Click on the roaming folder o the back icon to go one directory backwards and go to the Local folder.

Look for the Valorant folder and navigate through the Saved folder until you see the Config folder.

reduce-render-quality-valorant-1

Open up the config folder and look for ALL the folders under the (Valorant/Saved/Config directory) that has a file called GameUserSettings.ini

Open up the GameUserSettings.ini and scroll down until you see sg.ResolutionQuality setting.

Set this one depending on your preference (80-95% has very minimal reduce in video quality).

The more you reduce this percentage value the more the game would reduce the game render quality.

The lesser the game render quality = the more blurry the game looks.

reduce-render-quality-valorant-2

Once done, relaunch your game and tweak as to how much percentage should work optimally on your system.

Related Articles


Play Stardew Valley with friends online for free LAN 2020

In this video-article tutorial, I’ll be showing you the step-by-step guide on how you can install and play Stardew Valley with your friends online for free using LAN.

You’ll be needing to download a Windows/Mac APP called Zero-Tier One which will be used on the video tutorial. You can download the app using the download button link below.

Video Tutorial

Signup for Zero-Tier One

To use the Zero-Tier service, you’ll be needing to create a free account. Create your account or login if you have already your existing account here.


Valorant has encounted a connection error – 6 Solutions / Fix (2020)

In this video-article tutorial, I’ll be showing you 6 solutions to fix Valorant has encountered a connection error on Windows.

There are a lot of possible things that could cause this connection error on Valorant such as firewall issues, ISP issues, network and server issue, corrupted files and so on.

The steps that I’ll be showing are the compiled and tested solutions that WORKED for most of the people including myself so I’ll share them with you along with a video tutorial on this article.

Video Tutorial

Valorant has encountered a connection error – 6 Solutions / Fix (2020) | FreeSoftwareTips

Outline Solutions/Fix

  1. Solution #1: Automatic Startup VGC Service
  2. Solution #2: File Signature Verification
  3. Solution #3: Disable test mode & enable driver signature enforcement
  4. Solution #4: Windows 7 Hotfix / Security Update
  5. Solution #5: Check Windows Updates
  6. Solution #6: Delete Riot Vanguard Service, Folder, Reinstall

Solution 1: Automatic Startup VGC Service

  1. Open up start menu > services.msc > right click and run as administrator.
  2. Look for “vgc” service name, then right click and click on properties.
  3. Set the startup type to “Automatic”, then hit the apply button and ok. Then click on the start button if the service isn’t running.
  4. Test Valorant if it works.

Solution 2: File Signature Verification

File Signature Verification tool can be used to check for unsigned drivers that might be causing issues in conflict to the anti-cheat system of Valorant.

  1. Open up command prompt with administrative privilleges.
  2. Type in “sigverif” and hit enter.
  3. Click on start button to verify all files and drivers on your computer.
  4. It will then show you which drivers/files are unsigned which will be needed to be uninstalled manually or removed otherwise it will notify you that every files and drivers are properly signed.

Solution 3: Disable test mode & enable driver signature enforcement

  1. Open up command prompt with administrative privilleges.
  2. Type in “bcdedit.exe /set testsigning off” and hit enter.
  3. Next, type in “bcdedit.exe /set nointegritychecks off” and hit enter.
  4. Restart your computer.

Solution 4: Windows 7 Hotfix / Security Update

  1. Just simply download and install this Windows 7 Hotfix / Security update and make sure that it is installed on your system.

Solution 5: Check Windows Updates

  1. Open up start menu, look for “Windows Updates”.
  2. Click on “Check for updates” or “Windows Update Settings”.
  3. Be sure to keep your Windows updated as to avoid any conflict with Valorant anti-cheat system vanguard.

Solution 6: Delete Riot Vanguard Service, Folder, Reinstall

  1. Open up command prompt as administrator.
  2. Type in “sc delete vgc” hit enter.
  3. Open up task manager, look for “Vanguard” process or “Vanguard tray notification” process and end task that one.
  4. Go to C:\Program Files or where your program and files are located on Windows.
  5. Look for “Riot Vanguard” folder and delete it.
  6. Re-launch Valorant and it will download and reinstall vanguard for you.
  7. Restart your computer once done to initialize vanguard anti-cheat system and repeat Step 1 to make sure that vanguard is always running.

Related Articles


PUBG/Fortnite/Other Games DX11 Feature Level 10.0 is required to Run the Engine Fix

In this video-article tutorial, I’ll be showing you the steps on how you could fix PUBG/Fortnite/Other Games such as Bus Simulator error that says DX11 Feature level 10.0 is required to Run the Engine.

This error is commonly due to (1) Outdated Graphics Card Drivers, (2) Corrupted DirectX Installation and/or (3) Missing .Net Frameworks/ C++ Redist, (4) Improperly installed / updated a graphics card from an older version and lastly, (5) The graphics card does not support DX11 level 10.0.

Video Tutorial

Solutions

1. Update Graphics Drivers

First solution to fix PUBG/Fortnite DX11 Feature Level 10.0 is required error is to make sure to have updated Graphics drivers on your computer. You can download your respective graphics driver using the official pages linked by the buttons below:

NVIDIA GRAPHICS

ATI/AMD GRAPHICS

INTEL GRAPHICS

2. Update DirectX Installation

DirectX 11 and below can be downloaded and has a separate installation file. However, DirectX12 must be updated / installed using Windows Update Service.

3. Install / Update .NET Frameworks

Get the official .NET Framework from Microsoft Website link. PUBG lite must have a minimum .Net Framework version 4.5.2 installed on your computer.

4. Clean re-install Graphics Drivers

5. Check if your graphics card supports DirectX11 Level 10.0

Using the tool dxdiag tool on Windows 10, 8.1, 8, 7, you can determine what particular version of DirectX are you currently using and which level does your graphics card support under the “Display” tab.

To run dxdiag, go to search or run and search for “dxdiag” and run it as administrator. DirectX Version will be shown on the “System” tab while the DirectX Feature Level is shown on the “Display” tab placed right next to the system tab.


Fix: Stardew Valley not opening / launching on Windows 10

To fix Stardew Valley failure to open/launch on Windows 10 you have to install and update some pre-requisite components.

These components are needed to run the game especially on Windows 10 namely .net frameworks, xna frameworks, direct x, etc.

I have compiled the redist pack into an archive which can be downloaded below.

Stardew Valley Fix for Windows 10

  • Download and extract the redist pack on a folder.
  • Open the folder, _Redist upon extraction, and install all the setup files in the folder.
  • Run the dxwebsetup.exe (DirectX web setup which requires internet connection) will install the update direct x component for the graphics requirements of Stardew Valley, next the oalinst.exe, followed by vcredist_x86 setup (Microsoft Visual C++ Redistributable Package) and lastly the xnafx40_redist setup.
  • Once done, reboot your computer and relaunch Stardew Valley and see if that fixes the issue.

Download Redist Pack