1

Can’t Type Anything in Windows 10 Search Bar Solution

Today, we’ll fix the windows 10 search bar. I have compiled and collected almost all possible solutions to the problem wherein you are unable to type anything in Windows 10 Search Bar so watch the video and find the solution which works best for you!

I have made a step-by-step guide and compilation of the possible solutions to Windows 10 Search Bar where you can’t type anything or use the search function itself on Windows 10.

The command/s used in the video can be copied below.

Video Tutorial

How to fix windows search bar?

First solution that we can try is to reinstall the necessary app packages for the windows search component installed on Windows.

Commands :

Code # 1:

  • Open a PowerShell and make sure to run it as Administrator then enter sequentially the codes.
PowerShell -ExecutionPolicy Unrestricted
Get-AppXPackage -AllUsers |Where-Object {$_.InstallLocation -like "*SystemApps*"} | Foreach {Add-AppxPackage -DisableDevelopmentMode -Register "$($_.InstallLocation)\AppXManifest.xml"}

If the code above didn’t work, try entering another code below.

Code # 2:

  • Open a PowerShell and make sure to run it as Administrator then enter sequentially the codes.
$manifest = (Get-AppxPackage Microsoft.WindowsStore).InstallLocation + '\AppxManifest.xml' ; Add-AppxPackage -DisableDevelopmentMode -Register $manifest

Others Possible Fixes / Solutions:

Restart Cortana / Search service using task manager.

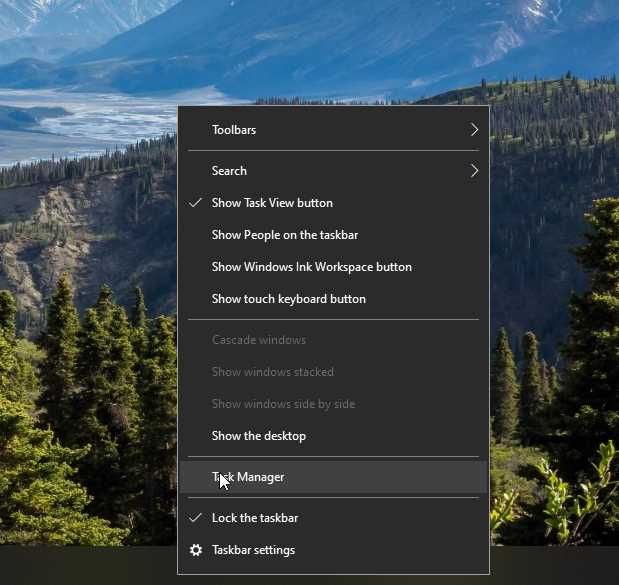
Open up a Task manager, right click on your task bar, click on Task Manager.


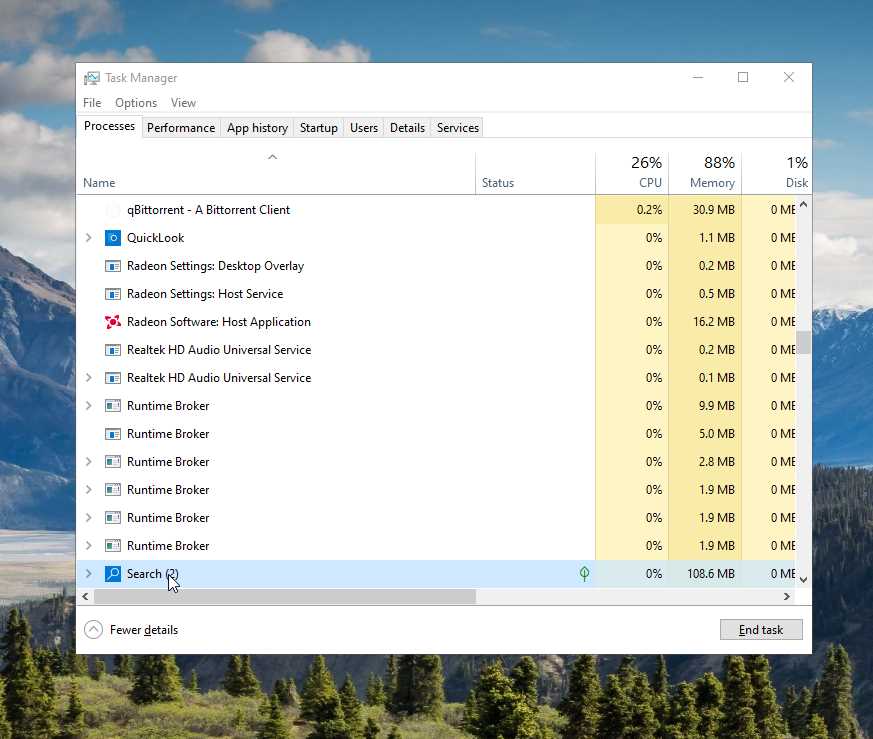
Look for the process “Cortana” or “Search” under the Process tab names.

(Tip: Hit keys on your keyboard “c’ or “s” to find processes that start with these letters.)

Click the end task button.

Restart Windows Search Service using services.msc

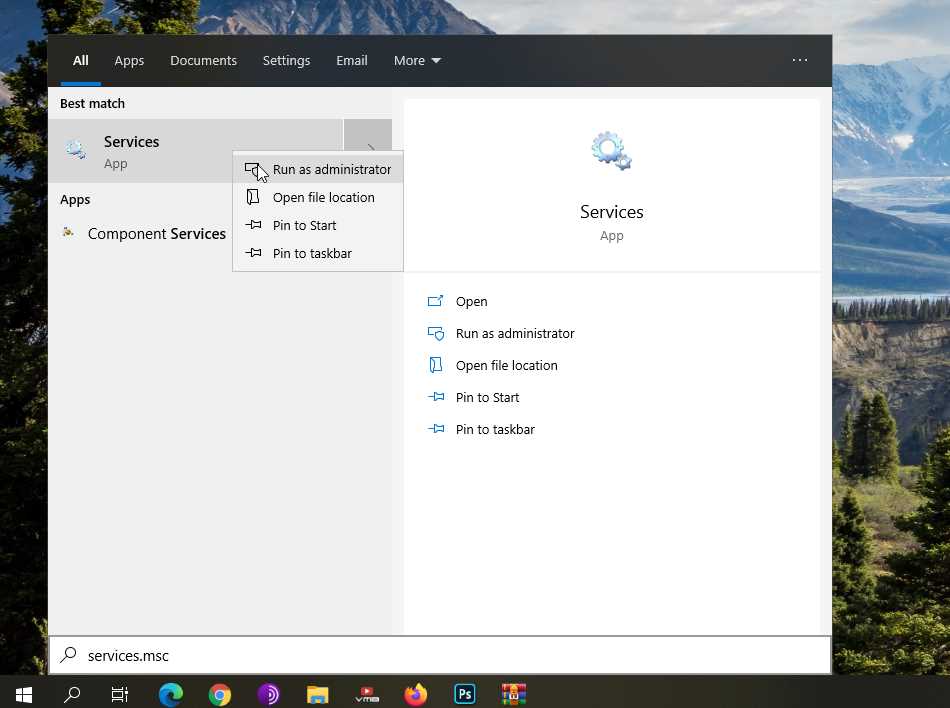
Go to your start menu, search for services.msc, right click on it and run as administrator.

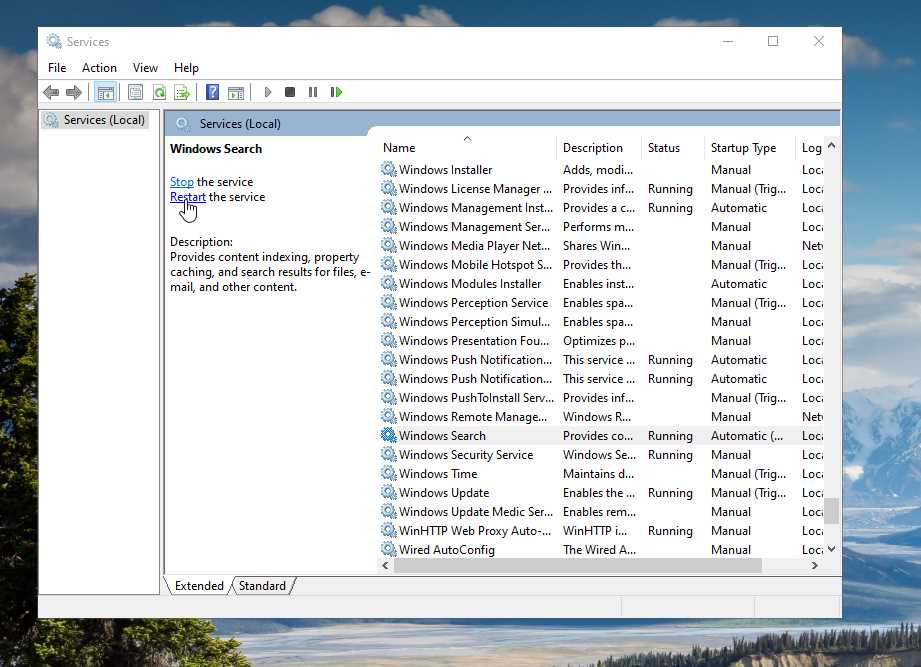
Look for “Windows Search” service and click on the restart service.

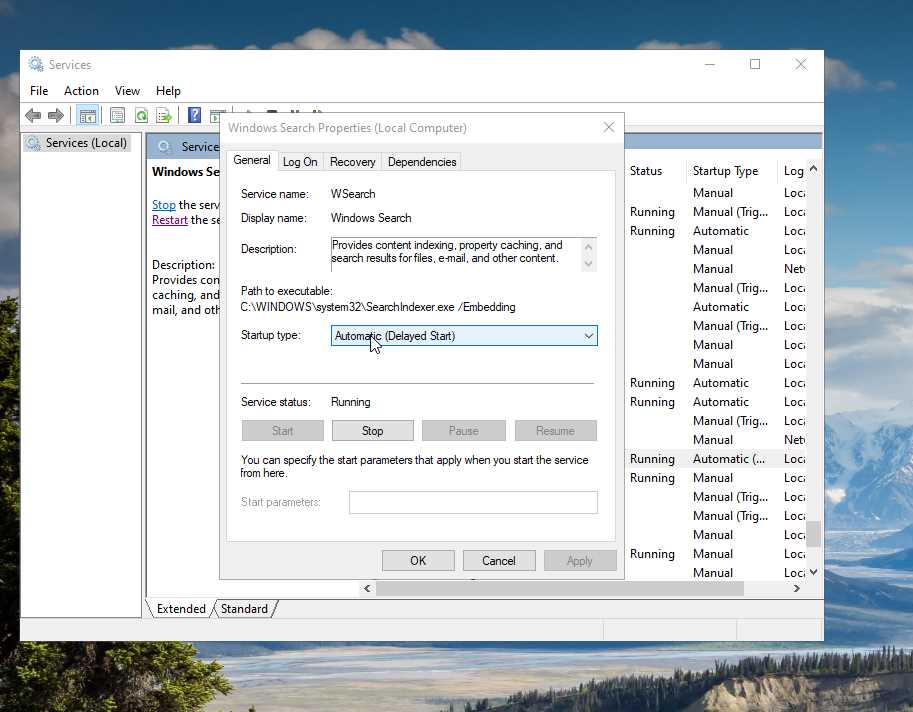
Then, right click the service and click properties. Make sure to set the start up type to “Automatic”. Then hit the apply and ok buttons.

Let me know which solution worked for you!


Enable Group Policy Editor (gpedit.msc) on Windows 10 Home Edition (2020)

Learn how to easily enable group policy editor or gpedit.msc on your Windows 10 Home Edition laptop, desktop, tablet by using a simple method.

Located below where you could download the tool we’ll be needing to install automatically gpedit.msc or Group Policy Editor app on Windows.

You can follow along the video-guide tutorial embedded on this article or proceed directly to simply running the bat file as administrator.

Video Tutorial

Download Gpedit-enabler.bat (Google Drive Link)

How to use gpedit-enabler.bat?

Simply download the batch file from the link above, and run it as administrator. Make sure you are connected on the internet.

Using the gpedit enabler bat file, it will run windows app packages commands to install gpedit or Group Policy Editor app on your Windows 10 Home.

Leave a comment down below if this worked for you or if you need help feel free to join and create a thread on Windows Forum for free!


Disable Windows Defender Permanently on Windows 10 (2020)

Easily disable windows defender in Windows 10 Permanently! Follow along in this tutorial if you want to temporarily or permanently disable windows defender which comes right out of the box when you install Windows 10.

Video Tutorial

Windows Defender

Windows Defender is a base-component included upon the installation of your Windows 10 Operating System which acts as Microsoft’s built-in antivirus for their operating systems.

The reputation of Windows antiviruses has been increasing for the past releases and updates of Microsoft which provides typical users with their basic protection against malwares and viruses.

However, if you want to disable this security component there are two ways in doing so:

Disable Temporarily

To disable Windows Defender temporarily, go to your start menu and look for Windows Security.

Click on the Virus & Threat Protection.

Open the manage settings under the Virus & threat protection settings.

Turn the real-time protection toggle to off.

This will temporarily disable Windows Defender service on your Windows 10 device. Upon a certain amount of time, the real-time protection will re-enable itself.

If you want to prevent this from happening, here’s the steps on how you could disable Windows Defender permanently.

Disable Permanently

Under the same window, Virus & threat protection settings, toggle the tamper protection to off.

Then go to your start menu, look for gpedit.msc and open it. (If you don’t have gpedit.msc click here)

Click on Administrative Templates > Windows Components under Computer Configuration.

Look for the folder Windows Defender Antivirus under Windows Components.

Double click on “Turn off Windows Defender Antivirus” make sure to set it to enabled. Hit the apply and ok button.

Then, double click on “Allow antimalware service to remain running always” make sure to set it to disabled. Hit the apply and ok button.

After that, go to “Real-time Protection” folder.

Double click on “Turn off real-time protection” make sure to set it to enabled. Hit the apply and ok button.

Double click on “Turn on behavior monitoring” make sure to set it to disabled. Hit the apply and ok button.

Lastly, double click on “Monitor file and program activity on your computer” make sure to set it to disabled. Hit the apply and ok button.

That’s it! You’ve successfully disabled Windows Defender permanently on your Windows 10 computer.

Video tutorial is included on this page in-case you want to have a step-by-step visual guide.

Let me know if this worked for you down on the comments below.